Monday, February 26, 2018

Best BBQ and Grilling Tips for 2018 (40+ Expert Tips)

40+ Barbecue and Grilling Tips


If you’re looking for the best hidden and highly
underutilized Barbecue Cooking and Grilling Tips, you’ve come to the right place. In this guide I will show you the top cooking and grilling tips that I use which have achieved me and my 700+ customer’s massive results for cooking and grilling barbecue.

Bonus: I’ve added links to our most popular BBQ Recipes to get you going fast and to achieve BBQ Success right away.

Before you start reading this page I highly encourage you to head over to my Facebook page and join me and others as we discover together the world of barbecue.

The Barbecue cooking process can be divided into separate and distinct categories and actions:
• Before the Barbecue, planning…what to cook?
• Preparation for the Barbecue, the grill, the meat, the sauces and seasonings
• Marinating, seasoning
• Tools and equipment for barbecue, containers and transport • Starting the grill, heat management, temperature control
• Managing the temperature and time continuum
• Confirming the ending of the cooking grilling process
• Resting and warming the completed barbecue
• Serving

My tips will center around these 9 categories each designed to help you achieve success on every level. Let’s Get Started!

A Before The Barbecue

Tip: #1 First determine if you’re cooking for yourself or with others. I know it sounds simple but if your are cooking for others you may have to consider whether someone has an allergy or dislike for some meat or food type. Focus on meats or foods that can be cooked or grilled within a 4 hour window.

Too often so many of the comments I get about barbecue cooking and grilling involve those who’ve had a bad experience or an unpleasant experience cooking a particular meat or vegetable. 90% of the time I’ve found that the reason the meat or vegetables did not achieve the success sought by the user was due to poor planning. So many see the latest cooking craze on one of the popular food channels then head out to their local market or butcher to pick up that rib roast or brisket with eyes on cooking the meat in 4 hours or less. Consider the meat, the grill or the stove, the heat used, the conditions for cooking and grilling either indoors or out, and realize the basics for every 1 pound of red meat it can take the average grill up to 2 hours to cook at 275 degrees. So, a 10 pound brisket will easily take 18 to 20 hours if slow cooked at 250 to 275 degrees to achieve perfect tenderness.

Tip #2 Good quality meat relies on tenderness and flavor and is directly related to what part of the animal the meat is derived from and also how you plan on cooking it. Begin with the end in mind an old adage told to me by relatives and friends over the years not to mention professors. Your selection of meat will ultimately depend on the primary purpose for the cut as well as factors like color of the meat, marbling, fat content, age of the cut, and days until the meat will actually be used.

Tip #3 Buy the highest USDA grade available that is compatible with your budget. Be careful not to get caught up in the hype of supermarkets latest scheme of the day with names like “Butcher’s Cut” or "Five Star Prime”. The terms are focus on deception as they attempt to sell lesser quality cuts of meat for upper quality prices to an unknowing public.

Tip #4 Buying meats that are frozen can save money over fresh cut but it’s important to properly manage the thawing process before using the meat. Improperly thawed foods will cook similarly to properly thawed or fresh meats however improperly thawed meats will remain cold and raw in the center much longer than fresh or properly thawed thus during the cooking process you may receive inaccurate reading while cooking meats especially if you are measuring the temperature of the meats at the surface level. Follow the proper process for thawing meats to reduce the potential for production of bacteria especially when meats were left out to thaw on the counter.

Tip #5 Raw foods and meats should be stored and prepared separately, especially when the meats are not going to be reheated right away.

Tip #6 Always remove frozen meat from its packaging before thawing in the fridge. This will help speed up the thaw process especially with the Styrofoam insulator is removed.

Tip #7 Cleaning is essential to stall the growth of bacteria. Clean any surfaces that have come in contact with raw meats and thaw water or marinades used during or after the thaw process. Thoroughly wash usage areas with warm water and soap. A 25/75 mixture of bleach and water can be used the treat the area as a final step after cleaning. Spray the area with the mixture ensuring that all surfaces have been removed of dishware; food stuffs, packaging or obstacles then spray the area and wipe down. Let the wiped area air drive before future use. The preparation process is probably the most important step in barbecue. So many fail to realize the simple truth if you start out wrong you end up wrong. First visualize how you want your barbecue to turn out. Do you want mild or spicy seasoned meat or sauced meat that covers your fingers and gets all gooey? Are you just looking for a char on your hamburgers of grilled meats? Let’s spend some time on tips that will improve your preparation process.
B Preparation for the Barbecue, The Grill

Tip #8 Cleaning the grill before use can actually improve its performance and produce better meals.

Tip #9 Most grill manufacturers recommend cleaning your grill after every use. By cleaning the grill you actually allow the grates to heat to their intended temperature creating a better sear and grilling result. Caked on or charred on meats from previous grill sessions can actually distort the cooking temperature requiring more heat and time to cook your meal.

Tip #10 Cleaning for a gas grill: turn all the burners to “HIGH” and let the grill run for 15 minutes. This will cook off most of the debris. Afterward, use a long-handled grill brush to scrub the grate while it’s still hot.

Tip # 11 For a charcoal grill: Scrub the grate with a long-handles grill brush while the grill is hot taking care not to burn yourself or melt any plastic brushes. When the grill has cooled, empty the ash pan into a fireproof bag and discard.

Tip #12 Charcoal ash is actually good soil amendment for your garden. If you’re an avid gardener who enjoys barbecue consider using the leftover ash in your garden to help break up the soil and to add some essential minerals.

Tip #13 If cleaning the grill with cleaning fluids always ensure that the fluids have been washed off or completely dried before placing the grate over high heat.

Tip #14 Using high quality all natural barbecue sauce, dry rubs and marinades can and do improve the taste of the meal but also can improve the satisfaction of your guests. Barbecue sauces and marinades are intended to tenderize and add flavor. Lesser sauces and dry rubs use ingredients sometimes considered unsafe and can actually collect leaving one feeling bloated or heavy. A good quality barbecue sauce or dry rubs like Jake’s Famous Barbecue Sauces and Dry rubs will not only help tenderize meats but will also help you stay in shape improving how you feel after the meal because they do not contain corn syrup, MSG, high amounts of sodium, artificial sweeteners, or strange chemical combinations. You get a better product with a better taste to improve your end results. See our link: Jake's Famous All Natural BBQ Sauce, Dry Rub Seasonings and Marinades today.

Tip #15 Charcoal Briquettes must be used properly to give you the best chance at achieving success. Focus on using briquettes purchased in the same season as your usage. Briquettes that are over a year old may not hold together well or deliver heat well throughout the cooking and grilling cycle.

Tip #16 Calculating the right number of briquettes to use. To calculate the necessary number of coals, cover the fire grate with an even layer of charcoal briquettes, edges touching, the number of briquettes needed to cover the grate is the exact number you will need to get the fire started. A good rule is to add 5 to 6 briquettes every hour to maintain a constant temperature by placing them directly on the existing hot coals. If using an indirect cooking method space the briquettes on either side of the grill.

Tip #17 Preheated briquettes - You can get a jump on the grilling process when needing additional briquettes to an existing grill session. Take a chimney starter and add 8 to 10 briquettes. Light the briquettes the standard way using newspaper or any flammable paper. Limit the use of materials containing dies or inks or cloth simply because they can give off odors or transfer trace amounts of these items to the briquettes and onto your meal. Once the briquettes have cooked down for about 10 to 15 minutes take a long pair of tongs and remove the briquettes one by one and layer them on your existing coals.

Tip #18 There are 11 Essential items you may need for your next barbecue when having family and friends join.

1. Portable vented grill, cleaned grill grates
2. Charcoal, lighter fluid, matches (some manufacturers sell small bags of briquettes designed for one use: burn them, bag and all--no lighter fluid required)
3. Barbeque tools: tongs, metal spatula, grill rack, oven mitts, apron to protect against spatter and grill contact
4. Grill spray such as PAM or spray oil to assist in removing cooked foods from the grill
5. Games: Frisbees, soccer balls, baseball bat, ball, gloves, kites
6. Chocolate bars and graham crackers for S'mores
7. Portable stereo
8. Insect repellant, sunscreen, first aid kit, sunshade or umbrella
9. White Vinegar, if barbecuing in a park with fixed tables wipe down the tables with White Vinegar 20 minutes before eating. Allow the vinegar to dry, which will keep flies and insects away from the table.
10. Baking soda or small fire extinguisher to tame grease fires
11. Transport Box to collect cooled grill and utensils after use
12. Garbage bags for trash and food removal
C Marinating, Seasoning

Tip: #19 Raw meat when cooked delivers very natural flavors. However, if you don’t enjoy meat that is simply cooked without seasonings then you should consider simple marinating methods with liquid marinades or dry spices. Let the liquids or spice rest on the meat for at least 1 hour or more then grill as you would normally. The dry spice or marinade will impart flavor to the meat enhancing the overall taste.

Tip #20 Never reuse a marinade once it has been on the meat. A tenderizing marinade contains food acids and tenderizing enzymes and can increase or speed up harmful bacterial changes that occur when meat is resting.

Tip #21 Marinades don’t have to be complicated to be effective. Take for example lemon or lime juice, vinegar, Italian dressing, salsa, yogurt and wine. Marinades are generally used with less tender cuts of beef like chuck roast, round, flank, and skirt steaks.

Tip #22 Tougher cuts of meat should be marinated for a minimum of 6 hours but no more than 24 hours. Longer times will result in a mushy texture.

Tip #23 Dry Rubs make excellent meat marinades. Dry rubs use combinations of herbs and spices and impart an added level of flavor. The actual process is similar to capillary action in that the moisture or sweat of the meat as it warms actually draws the seasoning into the meat. Because dry rubs don’t contain liquids they can be shaken on multiple times to build layers of flavor. As the meat moistens simply add an additional layer until you feel that you’ve seasoned the meat adequately.
D Tools and Equipment for Barbecue

Tip: #24 There are several essential tools needed to assist you in your barbecue effort. First always have a good pair of tongs that can pick up meats at a good distance separating you and the fire of the grill. Always have a good set of gloves for handling hot items or hot implements. Also, always have a good meat thermometer for checking temperature and for determining the time it takes to cook your desired meat.

Tip #25 For charcoal grillers always have an acceptable ash can or a way to put out the charcoals after using them in the grill. Heat management works on the before and after the grilling cycle. Focus on managing the charcoals as if they were a camp fire in the forest.

Tip #26 Work Surfaces become almost forgotten for so many grillers. It’s important to have a work surface that can hold tongs, gloves, plates, or dishes and different things like marinades or aluminum foil.

Tip #27 One of the best tools I’ve used over the last year is a digital read out thermometer. The tool is excellent for allowing you to work on other things like salads and side items while visually managing and keeping an eye on the temperature at 60 or 80 feet away.

Tip #28 A good grill that can handle enough barbecue such that you don’t have to grill half at one time then remove and grill the second half. I find that an 18 inch round grill works wonders for most people. One does not need to be fancy when getting started grilling just have a grill that you can easily manage and that can be wheeled in and around the area that you’ll be working.

Tip #29 A spray bottle for flare ups. As one starts on the path of barbecue inevitably there will be flare ups. Of course as you grow in your understanding of grilling and barbecue the opportunities for flare ups will occur few and far between. At that point the cooking and grilling process becomes one of heat management and with the right tools you may never see another flare up.

Tip #30 A stiff wire brush for cleaning the grill. This isn’t always needed but it’s a good idea to have one. Nowadays you can get a multi-sided plastic tool that has a brush on one side, a cleaning pad on the other and a wire brush on one side as well.

Tip #31 A good knife that is sharp and can be used to cutaway sections of fats on meats as you prepare them for grilling.

Tip #32 Plastic bags or a plastic container. We use plastic bags for containing meats just after we marinate or season the meats. The bags eliminate the need for additional washing and store easily in the refrigerator. Containers also work well but of course there is the clean-up that follows.

Tip #33 For Gas grills a backup source for gas. We’ve used a number of gas grills and it’s always at the most critical moment when you realize that you ran out of gas 10 minutes earlier. Keep an eye on the gas and an extra container to minimize disruption.

 Tip #34 A pan or a tray for cooking vegetables. Cook vegetables on the grill grates is the standard way but it helps to have a tray when you’ve got a lot of items on the grill that need to finish at similar times.
E Starting the Grill Heat Management

TIP #35 The key to any barbecue is getting the grill started. First things first, if using a charcoal grill the simplest way to get a lot of coal started is just plain old lighter fluid. However, the down side is the smell of lighter fluid and possible carry over to your meat. The second best way is to use a chimney lighter. The lighter is a simple device that works off old newspaper wherein the charcoal is added in the tube and lit from the bottom up. After about 15 minutes the charcoal is transferred to the grill ready to go. For Gas grills the process is simpler just ensuring that you have an ample amount of gas then after turning on the gas delivery lines depressing the igniter to create a spark and light a flame.

Tip#36 Never add lighter fluid directly to a flaming grill. This might seem obvious but believe me each year a number of people end of in the hospital because they didn’t follow this simple rule. Use a lighter chimney to save you time and personal injury.

Tip #37 Use the right amount of heat to grill foods. It’s always better to overestimate than underestimate the number of charcoal briquettes required to grill meats. Disappointment comes near the end of the barbecue when your meat is almost done at least 10 degrees from completion and your charcoal burns out and you realize you don’t have any more in stock. Keep a reasonable supply of charcoal on hand. The same goes for gas grills, keep a backup tank in store.
F Managing the Temperature and Time Continuum

Tip #38 Grill vents can save your barbecue. Actually managing heat and temperature through the use of grill vents is critical to the success of your barbecue. Start charcoal grills with the vent wide open, then notch down the grill when the temperature exceeds the range you direct to cook. Keep in mind notching down too much can stifle the oxygen available to keep the coals going thus causing the cook cycle to slow down. Also, we want to ensure that meat cooks in a reasonable range somewhere around 225 to 275 degrees, not too low and not too high.

Tip #39 Gas grill vents are very similar to charcoal grill vents. The difference being that gas is delivered and managed through a primary source in many cases a tube underneath and in the center of the grill delivers the actual gas. If you close off the vents too much you can starve the grill of air which will eventually kill the flame. Note, gas will continue to flow but there will be no flame this is very dangerous and one must be careful to first open the grill to allow the excess gas to escape then re-light the grill. Lighting the grill after may cause a small explosion and can damage parts of the grill or ruin your meats.
G Confirming The Ending

Tip: #40 Some may be thinking that knowing the end of the cooking process is common sense but believe me it isn’t. Many people don’t actually know when their meats are done. The secret is to know what temperature you want before you start and to have adequate tools that will measure for that temperature when cooking. Get a good meat thermometer and check our cooking chart to ensure you know when your meat is done.
H Resting and Warming

Tip: #41 More critical for some meats is the process of resting. Too often people grill some luxurious roast or steak only to find that their meats are tough. The meats during testing on the grill seemed fine however, something miraculous happened which can’t seem to be explained. Well we have an answer, meats need to be rested. Larger meats require longer resting periods. Resting allows the juices of the meat to be re-absorbed and juices that remain in the meat add to the tenderness of the meat. If you cut into a steak or roast right after it has been removed from the grill you might notice a puddle of juices on your plate. That simply says you should have rested the meat longer. We suggest a minimum of 20 minutes for a roast and 10 minutes for a steak. Some roasts will be rested for up to 30 minutes or more depending on size.
I Serving

Tip: #42 Serve Barbecue when it is warm to hot. If desired warm some bbq sauce and have it in a container on the side much like the sauce for buffalo wings. Barbecue can be served with mashed potatoes or fries but the centerpiece is always the barbecue.

Tip #43 When serving barbecue, if your plates aren’t already warm you can do so by setting them in the oven at 150 degrees for 4 to 5 minutes. Remove the plates and place them on a counter top adding the barbecue directly to the plates. Do not place warmed plates on anything plastic as melting or warping can result.

Tips #44 Wood Chips – for better smoking results soak wood chips for about 20 minutes before you barbecue then place chips directly on coals. Gas grills have smoker trays that can be added or purchased to produce the same smoke effect.

Tip #45 The most common smoking woods are hickory, mesquite and alder. Start with basic hickory using just a few chips until you master the process.

Tip #46 When grilling steaks ensure that charcoal or your gas grill reaches a minimum of 500 degrees. Steaks should be seared first then allowed to finish indirectly if doing so on a barbecue grill.

Tip #47 Keeping food warm after the barbecue: To keep food warm afterwards use water coolers, hot water baths or chafing dishes. Each is specific to the task and can hold the temperature on barbecue for hours.

Tip #48 Cutting Tri Tip Roast: This meat is often labeled the “Santa Maria Steak” and is especially popular in California. The best way to cut the meat after grilling is cut it on a bias across the natural grain of the meat. Follow the grain and move your cuts with the changes of the grain. Cut the meat into ¼ inch strips which can be easily chewed. If you don’t intend to eat the entire portion of the Tri Tip, reserve the uncut portion and place it in a plastic bag and hold in the refrigerator. Tri Tip can be held for at least 5 days without concern.

Tip #49 Putting BBQ Sauce on Steaks: In most cases adding barbecue sauce to steaks is far preferred than adding the sauce during the cooking process. Most good steaks cook about 8-10 minutes per side when the temperature exceeds 500 degrees. You can add sauce sparingly to the steaks then place them back on the grill to charbroil in the flavor. Keep in mind the additional cooking time may make the steak tougher. Best bet is to add the sauce about 10 degrees before the finish of the steak to ensure that the sauce is warmed and the steaks turns out nicely.

Interested in joining our site just click here Let Me In

BonusBBQ Recipes

#1 Baby Back Ribs, Tri Tip And Fennel Style Recipe

Ingredients:

Directions:
Pour 1 Tablespoon of Fennel either whole or ground into a Cuisinart or similar blender. If using whole Fennel seed you may consider setting your blender to chop until the seeds have broken down to about 1/5 their size. Once the Fennel is blended open the 5 Oz container of Tri-Tip Rub and pour in with the Fennel. Continue blending the Tri-Tip Rub and Fennel together until thoroughly mixed. When done pour the Tri-Tip Rub and Fennel mixture back into the 5 Oz container. Shake on to the ribs and let rest 1 hour before grilling.

Recipe #2 Burgundy steak marinade brings out the tantalizing, full rich flavor of steaks........

Ingredients:
  • 2 Rib Eye or New York steaks For Marinade
  • 1/2 teaspoon salt
  • 1/4 teaspoon pepper
  • 1 clove garlic, minced
  • 1/2 cup oil
  • 1/2 cup burgundy or dry red wine
  • 2 tablespoons ketchup
  • 2 tablespoons molasses

Directions:
Combine marinade ingredients and mix well; Place mix in container and add steaks; turn to coat, Cover and seal. To make steaks tender marinate for no more than 2 hours. Steaks can be marinated for more than 3 hours if desired, however, steaks may become mushy and may lose their natural flavoring.

Recipe #3 Grilled Barbecue Pork Steaks are fantastic for grilling and make and excellent meal.

Follow the steps to achieve your grilling bliss.

Ingredients:
  • 4 pork blade steaks, 1 to 1 1/4-inches thick
  • 1/2 cup bottled barbecue sauce
  • 1/3 cup honey
  • 1 tablespoon Worcestershire sauce
  • 1 teaspoon garlic salt
  • 1/2 teaspoon prepared mustard

Directions:
Place steaks on grill about 4 inches above medium-slow coals. Cook about 8 minutes on each side meanwhile, stir together remaining ingredients in a small bowl. Brush steaks with sauce and continue cooking 5 minutes more, turning and brushing with sauce.

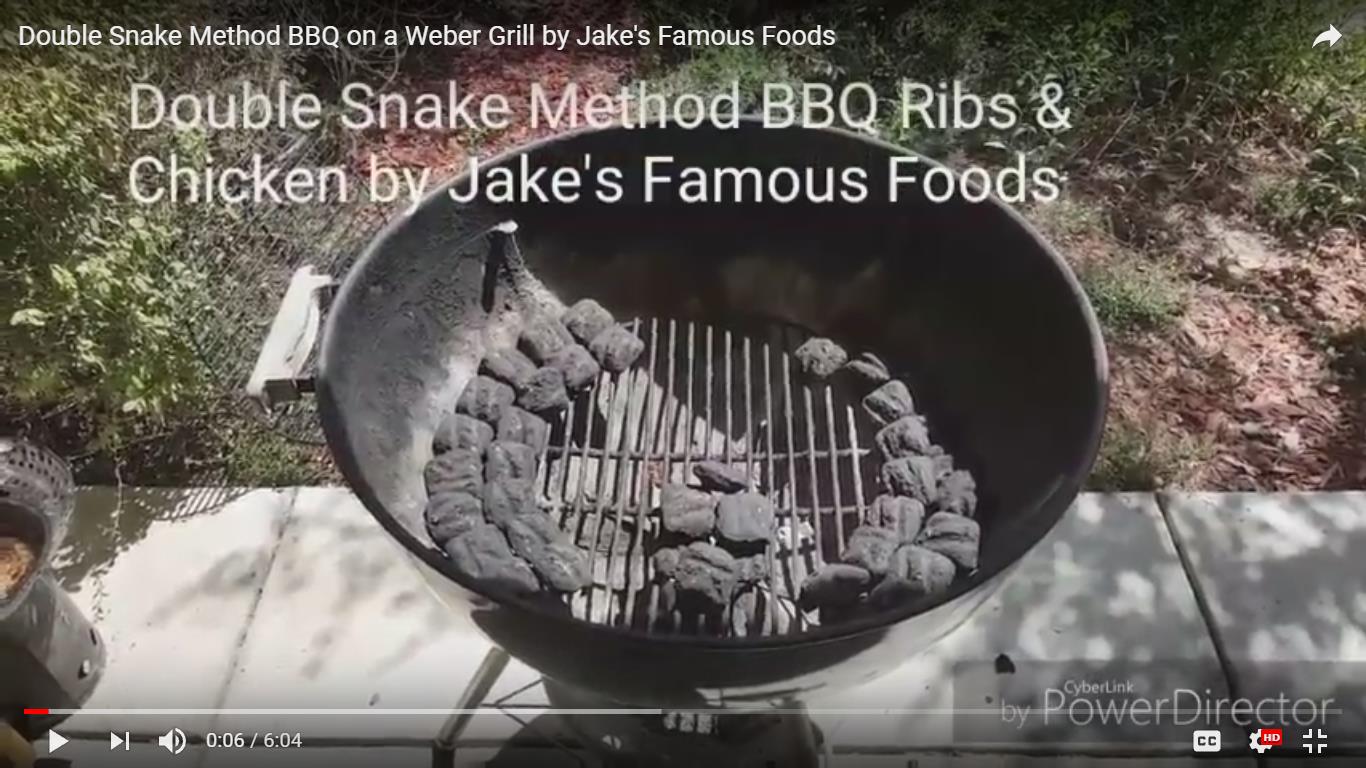
Double Bonus Video: Double Snake Method BBQ Ribs and Chicken by Jake’s Famous Foods

Double Snake Method Barbecue


Interested in joining our site just click here Let me In

I Serving

These are a lot of tips to take in…so sometimes it’s a good idea to just stop and smell the roses while your mind absorbs the material. There’s an actual study that taking a break or meditating can actually amplify your mental clarity. But when that’s over…just get back to the Barbecue.

We hope you've enjoyed our 40+ Tips on Cooking and Grilling Barbecue. If you have a Tip that you would like to add just click on our contact link below and send your Tip. We will include your Tip and name with this post. Contact Us.

Summary
Overall these tips prove to be helpful but this post could be longer. We think listing around 100 tips in total is not a completely unreasonable goal.

Thank you for reading.....

Thursday, November 9, 2017

Make Homemade Bourbon Glaze Recipe


Our updated classic Santa Maria Style Bourbon BBQ Glaze Homemade Recipe made with authentic ingredients. Our Bourbon Glaze recipe shows you steps to make this BBQ Glaze.

To help out the many requests we receive for our Tri Tip barbecue recipe and Bourbon Glaze we have created two videos. The videos are designed to show step by step instructions for making each of these popular BBQ Recipes.

Our Bourbon Glaze recipe is the perfect accompaniment for chicken, ribs, tri tip, steaks, lamb and more.  The Glaze uses Jake's Maple Bourbon BBQ Sauce which is filled with non-alcoholic Natural Bourbon and Maple flavors.

Glaze Ingredients:
1/4 Cup Jake's Famous Maple Bourbon BBQ Sauce
1/4 Cup Butter
2 Medium Onions, minced
2/3 Cup Jake's Famous Ball Park Ketchup
1/2 Cup Apple Cider Vinegar
1/2 Cup Fresh Orange Juice
1/2 Cup Maple Syrup
1/3 Cup Dark Un-Sulphured Molasses
2 Tablespoons Worcestershire Sauce
1/2 Teaspoon Freshly Ground Black Pepper
1/2 Teaspoon Salt


In place of Jake's Maple Bourbon BBQ Sauce you can use 3/4 C Bourbon (**Inexpensive is fine and optional, you can substitute something else with similar flavoring if desired)

Steps:

1. In a large saucepan melt the butter with the oil over medium heat.

2. Add the 2 Medium Onions Minced, sauté for 5 minutes or until Onions turn golden in color.

3. Add remaining ingredients into the sauce pan; reduce heat to low and cook until mixture thickens about 30 minutes stirring frequently.

When the glaze reaches your desired thickness you can let the ingredients cool for 5 minutes then spoon directly on your meat. For thicker glaze just continue reducing ingredients for an additional 15 to 20 minutes.

Jake's Maple Bourbon BBQ Glaze Recipe


Serve with BBQ meats or serve with tacos or wraps as desired.

Jake's Smoked Tri Tip Video


Monday, October 30, 2017

Double Snake Method BBQ

Our Snake Method BBQ Video was extremely popular so thanks to all for watching.  One thing we realized is the Snake Method is great if you've go 5 or 6 hours to stand around barbecuing.  But what if you've only got 3 or 4 and it's getting close to dark.  No one want to stand outside in the cold flipping tri tip or hamburgers even if it is bbq.  So, for that reason we authored a new video based on what we call the "Double Snake Method."  This method works exceptionally well and we use it often.  This method allows us to achieve maximum smoke in half the time with even heating and grilling.  How does it work?   Effectively, charcoal is laid out in a two row layer trailing around outer ring of the grill then a second set of briquettes just like the first is laid out on the opposite side of the grill.   Afterward smoking chips either, hickory, red oak, apple wood, pecan wood or other are laid on top of the those charcoal briquettes such that when lit from the starter stack the major portion of smoke will be delivered at the front end of the process.  As the heat gradually moves down the rows of charcoal additional chunks of smoke wood are burned at specific time depending on placement.  If you want less smoke or you want it later in the cycle then you can either middle load or end load your wood chunks as they are spread out across the charcoal.


The key to effective usage is managing heat along with a reasonable selection of the meat to be smoked. All meats can be smoked but time is the most important element in the process or at having an idea of how long a meat should be cooked or subjected to smoke.

In this BBQ video we use our grill to smoke Beef Ribs and Chicken. The process takes us just over 3 hours using the Double Snake Method. We walk you through the process also we give some insight into managing the cooking process and the results associated with grilling. Leaving meats too long on the grill or in too much smoke can produce toughness and bitterness. We show you a simple way to add back moisture to further tenderize the meat and to assist in the cooking process.


In addition to the video we discuss the use of our Jake's Famous Memphis Blues Sugar Free Dry Rub.   This is the second in our series of Sugar Free Rubs with a focus on delivering exacting quality and premium taste all without sugar.  Check out our video and backlink our site to connect you with our never ending quest to deliver great barbecue information and great ideas to improve your barbecue process.

Thank you,

Jake
Jake's Famous Foods

Saturday, August 5, 2017

Snake Method BBQ Ribs by Jake's Famous Foods

For the last few months we've been listening to videos on varying forms of Snake Method cooking.  For those of you who don't know...Snake Method is the trailing form of heat and fire that follow a predetermined line of charcoal.  The charcoal can be in a circular grill or a rectangular one.  The grill type really doesn't matter but what does matter is the fact that coals which have been pre-lit and are ready to go are place adjacent to un-lit coals which in time will become part of the lighted batch.  The heat and fire will follow the line of charcoal slowly moving towards the end of the coals just as if it was a snake moving in slow motion.  Typically, you lay out a row of two base coals followed by one or two coals on top of those coals.  The best part of the process is that it takes a smaller amount of coals to achieve the same heat levels as normal.  Good steady temperatures around 250 to 300 degrees can be achieved using this method.  The most primary element one needs besides the coals is time.  Snake method cooking can take up to 5 or 6 hours depending on if you're smoking ribs or chicken.

So, I created one of my very first videos on Snake Method BBQ Ribs on my Weber grill turning it into a smoker.  Just listen along and follow the steps and have some fun.  Over time I hope to be doing some additional videos and I'm 100% sure my video skills will improve.

Thank you for watching.....Jake


Wednesday, July 12, 2017

When to put BBQ Sauce on Steak? The question seems simple enough...but wait there's more.

Most of the people I talk to in the BBQ biz certainly have made hundreds of steaks, chicken and ribs but few have ever consider just when a steak needs BBQ Sauce. We'll discuss two ways of doing that in this page. First, let's talk about the consensus of Executive Chefs, grill masters, bbq cooks, restaurantuers and general industry folk. In almost every case (97% to be exact) said, adding BBQ Sauce to a steak while on the grill was a NO, NO. But they did agree that having the right BBQ Sauce on a steak added immense flavor without covering up the taste of the steak. 


The above response leads us to the question when should it be applied? If adding BBQ Sauce the question is how do you want your steak to turn out? Is your steak a tender filet, or a tough sirloin? If the answer is tough sirloin then you'll want the BBQ Sauce to marinate on the steak assisting in breaking down some muscle fiber which acts to tenderize the meat. A Brine will achieve the same thing in terms of marination but one must be careful to remove the brined meat in a timely fashion so as not to make the meat soggy. If using BBQ Sauce on the sirloin place the meat in a container, either plastic bag with a seal or container with a lid. The container should not be more than 2 times the size of the steak. First check the ingredient label of the BBQ Sauce, note where things like Vinegar, and oil, and any mustard's are listed relative to all the other ingredients. This will tell you whether or not your sauce is a marinating sauce or a strictly tasting sauce. When Vinegar appears at the end of the label you can bet the sauce has more taste capabilities than marinating. Overall this will mean that you need to add at least 30 minutes to an hour more of marinating time to achieve results when the amount of vinegar or mustard is small. 

After marinating remove the steak from the marinate and discard the marinate. The marinate should not be used for anything else. For safety and health reasons just toss it away. You don't have to scrape any off your steak just wrap it in foil or put it in a clean bag or container and rest it in the fridge until your grill is ready. Once the grill is set place the steak on. Keep in mind a really good steak needs a really high temperature. Most stoves can't achieve the temperatures that a restaurant can (700-800 degrees) but you can achieve that level if you have either a cast iron pan or a nicely managed wood fired grill. When grilling steaks after they've been marinated it is not necessary to add additional BBQ Sauce during the grill process. If you want heavy BBQ Sauce flavor you can baste on some sauce a couple of time during the grilling process. Most good steaks cook for about 8-10 minutes a side when the temperature exceeds 500 degrees. For Medium Well the steak should be on the grill at least 8 minutes per side. Check our temperature and cooking charts for steaks to be sure. Once grilled remove the steak and place in a warm container, not a cold one. Cover the steak and let it rest about 8-10 minutes. DO NOT cut into the steak after pulling it off the grill without it resting. If you do the juices will run out of the meat leaving the pieces tougher than they would have been if rested. Restaurants will only rest a steak for 2-3 minutes before serving but they do rest them. 

The Second Method I mentioned earlier is the method we prefer. Steaks are expensive and most people buy them because they want the true taste of steak. We seasoned our steaks with out Tri-Tip, Steak and Rib Rub then we let the steaks marinate in the seasoning for at least an hour. The steaks are covered and placed in a fridge on a middle shelf during the marination process. We like using wood fire (Red Oak) or Charcoal with smoking chips. If using smoking chips make sure you soak the chips in water for at least 2 hours. Then put a handful of chips on the coals or in a smoke box once you have reached the right temperature for grilling. If I can't use a grill then I use a cast iron pan on high heat. I season the pan with a little butter first then add one (1) steak at a time. Before cooking I cut off a small portion of the steak and cook that alongside the larger steak. This allows me to check the cooking status of the steak without cutting into the larger steak releasing the juices. I cook the steak about 8 minutes per side depending on the thickness of the steaks. Once cooked I rest the steak for about 10 minutes. I take the BBQ Sauce that I want to use and put it in a warmed container. That sauce becomes more of a condiment at this point and my guests are afforded the opportunity to lather on as much sauce as they prefer during their eating process. 

The long and short of this conversation is what kind of steak are you going to cook and how do you want it to turn out. The best steaks are planned especially where the cooking/grilling process is concerned. The best marinating bbq sauces have a decent level of vinegar and mustard to break down muscle fiber. Most chefs and grill masters typically don't marinate steaks in bbq sauce but actually prefer salt and pepper shaken onto the steak about 5 minutes before grilling. 

We hope we've helped you make up your mind on using BBQ Sauce with steaks. If you find you'd like additional information please contact us through our website at jakesfamousfoods.com or our link: Contact Us

Monday, June 12, 2017

Homemade Chicken and Beef Ribs BBQ

One of the best recipes for summer or anytime is Chicken and Ribs.  Not just any ribs but full on BEEF ribs that are meaty and bold with full flavors that don't overpower the meat.  And how about juicy full flavored chicken?  Well in this recipe we will show you how we make juicy chicken and savory beef ribs right on our very own Weber grill. 

We've taken pictures and put them into two stages:  Step 1 is the being grilled on the charcoal grill for about 1 hour. 

In this step we took a whole chicken and split the chicken in half.  Since our Weber is about 18 Inches in diameter and the fact that we are going to be cooking with indirect heat we didn't have a lot of room to spread both the ribs and chicken out over.  You will need some plastic bags or containers to hold the ribs and chicken within separately.  First after splitting the chicken coat both with Standard Yellow Mustard.  The mustard will marinate the chicken actually pre-marinating it for the later addition of the dry rub.  Once each is coated and placed in their respective containers, place the containers in the fridge.  I like holding in the fridge overnight.  But if you only have a few hours then hold the chicken and ribs for at least 1 hour in the fridge.  Afterward you will want to season the chicken and ribs with our very own dry rub seasonings Jake's Famous Tri Tip Rub mixing in 2 Tablespoons of Jake's Famous Pure Santa Maria Dry Rub.  Coat the chicken thoroughly inside and out.  Then place the chicken in its container and place back in the fridge for another hour.  This will allow the seasons to effectively marinate the chicken. 

On the Beef ribs you have a choice, straight dry rub or you can add a little Asian flavor to the ribs.  If you just want straight dry rub then follow the same steps as the Chicken.  Coat the beef ribs and place in the fridge. 

Picture one below shows the first stage of barbecue.  As you know the difference between barbecue and grilling is straightforward.  If you use high heat and cook quickly you are grilling.  If the heat is moderated and you cook over time you are barbecuing. 

After marinating in the fridge leave enough time to have the Chicken and Beef Ribs rest on the kitchen counter for at least 30 minutes. We want to barbecue when the meat is close to room temperature. Making barbecue with room temperature meat means the meat will cook more evenly and doesn't need to first warm up before the cooking process begins.

ChickenRibs

For Step 2 let's say you want to try a really nice Asian Marinade then follow these steps. 

INGREDIENTS:
4 Tablespoons Soy Sauce
2 Tablespoons Sesame Oil
4 Tablespoons Jake's Famous Ball Park Ketchup

Blend the mix together and coat the rib then place the container in the fridge for at least an hour.  Step two below shows how we've barbecued the chicken and ribs at about 275 degrees for about 2 hours.  We barbecued for 1 hour with the meaty side of the chicken toward the heated briquettes then flipped the chicken and ribs over and continued to barbecue with the meaty side closest to the heat source. 

Since we are barbecuing on indirect heat we prepared our charcoal just until the coals began to ash white then we spread the coals to one side away from the meat to be cooked. Place the Chicken and Beef Ribs on the grill. Put the lid on and add a temperature thermometer to track the heat level. On our Weber we cranked down the vents on the top and bottom of the grill to about 1/4 to 1/2 of the opening space to get the right level of heat.  Indirect heating allows the heat and or wood smoke to roll over the meat creating a nice layer of heat just before the heat rises out of the top of the grill. Keep in mind cranking down the vents does not drive the temperature down instantaneously, you will need to check the grill every 5 minutes at least 3 times before the temperature settles down into the range you want.  

Once you've cooked for about an hour and a half it's time to think seriously about testing the temperature of meats. Take a meat thermometer and test the chicken in the breast area and in the thigh area.  The FDA says that a breast and thigh temperature of 180 is acceptable for serving so that's my target.  The same goes for the ribs.  If you enjoy your ribs close to medium then check that the temperature gets to 160 and then pull them off the grill.

This next step is extremely important.  Place the Chicken and Beef Ribs in a large container with a lid.  I like to use an aluminum pan then I spread aluminum foil over both and crimp it down.  Keep the Chicken and Ribs sealed in the container for at least 15 minutes.  This containment process will allow the meats to finish cooking and will restore the liquids in the meats so that they don't drain out on the first cut which can make the meat tough. 

ChickenRibs2

In the following picture I've added asparagus that I cut the ends off and soaked in water for about 20 minutes.  Then I coated the asparagus with a little vegetable oil and garlic salt.  I placed the asparagus in a grated pan and placed that directly over the remaining heat source.  I placed the lid on the grill to allow the chicken and beef ribs to complete their cooking cycle.  After about 15-20 minutes I checked all the items.  Once everything was done I put the Chicken, Beef Ribs and Asparagus in an aluminum pan then I covered them with foil. 


Chicken and Ribs BBQ W/ Asparagus

This is a wonderful meal and really sets the stage for a homemade home-style barbecue.  I hope you'll give this one a try.  To get our dry rubs just go to our dry rub links and add to cart.  The Asian marinade can be made with simple home ingredients.  If you need more direction on how to make this barbecue just send an email to: jakesfamousfoods@gmail.com.  If you email we'll provide you with a free item on your next order. 

Server and Enjoy!

Jake

Saturday, September 24, 2016

Changes are a foot at Jake's.

All over the past year or so we've been working on lots of new products, a new website, new markets and a host of exciting changes.  First of all we've finally changed our business name from Jake's Barbeque Sauce and Seasonings Company to Jake's Famous Foods, LLC.  This was the most significant change from a professional point of view.  Following that change was the consolidation of all of our labeling into one uniform format.  Gone are the days of our initial block type lettering.  That block lettering has been replaced by smoother curved lines with more of a mainstream appeal.  In addition we added a series of new products from our Memphis BBQ Sauce to our amazingly popular Chipotle Mayo, Sriracha Ketchup, Maple Bourbon BBQ Sauce and Santa Maria Style Dry Rub and immensely popular California Chicken Rub.  Right now we are in the final stages of completion and introduction of a new line of (SFR) Sugar Free Dry Rubs suited to the sensitive and aging markets which may be more apt to be concerned with foods that are healthier and less sugar driven.

In addition to new products we've updated our website from jakesbbqsauce.com to jakesfamousfoods.com.  This was a major change requiring the conversion of all of the materials outlining our products and all of the marketing tools.  Our old site has been added to the redirect list aimed at www.jakesfamousfoods.com.  Just recently we completely a responsive update to our site making it more adaptive to cell phone and ipad traffic.  Along with these changes we enlisted a new online campaign through Bing and Google to make our products more publicly aware.  Regarding our business we've added new locations to distribute our products as well as the addition of a new co-packer.  These changes as you may have imagined have taken a considerable amount of time and our blogs have suffered.  We look forward toward providing more support to our blogs and toward making our customers aware of the new and exciting changes within Jake's Famous Foods.

We hope you will join us on our blog as well as our website at www.jakesfamousfoods.com.  Send any comments our way and we'll assist you any way we can .

Thank you,

Jake

Saturday, July 19, 2014

How Do Grill Vents Work? Should They Be Opened Or Closed?

For years now I've been asked over an over about the vents on grills and how best to use them.  So much so that I've decided to place a post on what the vents are for and whether they should be opened or closed during grilling.  See our website for even for details as well as access to our great line up of products Jake's BBQ Sauces and Condiments

When cooking your most famous bbq meal managing air circulation is extremely important in keeping the charcoals burning. Even the largest pieces of food can be cooked just the way you like, because you control the fire temperature by opening and closing the top and bottom vents. If the food is cooking too fast, lower the heat by closing the vents a bit. To raise the heat, open the vents to let in more air. While preheating the grill, keep the bottom vents open to help start the fire. Many charcoal grills are equipped with a lever that can be pushed to sweep the bottom vents clear of ashes, which should be done occasionally throughout the cooking period. When you're finished cooking, close the vents completely to snuff out the fire (do not pour water into the grill).

With a gas grill, leave the lid closed at all times in order to maintain temperature. Gas grills work best with the lid closed during cooking, so that the heat circulates around the food. 

Keep in mind that a windy day will make a charcoal grill a bit hotter (because it will oxygenate the coals), while a gas grill will run slightly cooler. Choosing a location that's sheltered from strong winds can help maintain grill temperature.

When cooking when is the best time to open the grill vents?  Typically, the grill vents should be opened soon after the lid has been removed and the charcoals have reached their desired cooking temperature.  Opening the vents allows air circulation which draws air through the bottom vents of the grill across the coals onto the meat and with heat rising upward through the top of the barbecue.  With meats that are thicker and that require more time you want to sustain the heat levels necessary to cook the meat.  A good idea is to leave the vents open between 1/4 and 1/2 of their total opening area. This will provide a reasonable amount of air necessary to retain the charcoals while they cook the meat without burning through the coals too quickly.  For meats that can be grilled quickly and thus require a higher amount of heat open the vents wide open keeping in mind that charcoal will be burned at a higher rate and may require additional charcoal if more items are to be cooked later.  

Always check to see that the vents are open on the bottom and top of the grill when using charcoal.  If using gas keep the vents open just after lighting the grill then adjust the vents downward once the grill reaches desired temperature.  

Mastering the vents can be done in 1-2 grill sessions but once you figure it out you'll find out how much fun it can be to perfectly adjust the vents for just the right grilling temperature.   

Thursday, July 3, 2014

Making a Great 4th Of July With Excellent BBQ Recipes

The 4th of July is a special time for these United States.  And while we’re gathering with our friends and family we want to make sure that we thank all those who placed themselves in harm’s way for our freedoms.  So take a second to thank our fallen and also be sure to thank the military on this day. 
In addition to thanking our military we’ve put together a couple of honest to goodness recipes that almost any weekend barbecuer can use to make their day special.  We’ve laid down our easiest rib recipe along with a great chicken recipe and of course an easy to make drink recipe.  For over 100 additional recipes see our website at www.jakesbbqsauce.com and go directly to the recipes section.

Recipes:
Lee’s Lazy Man BBQ Rib Recipe:
This is a simple recipe for cooking barbecue ribs.  The best part is that it works every time and doesn't take much effort at all. All you need is a stove that can cook at 425 degrees, country style bbq baby back ribs, and about 4-1/2 hours of cooking time.  Once everything is cooking I prepare potato salad and cut corn as sides.

Ingredients:
Start with Country Style BBQ Pork Ribs and follow these steps.
Clean and trim off any excess fat if necessary.
Peel off the thin membrane on the back of the ribs.
Generously sprinkle on some of Jake's Tri-Tip Rub Barbecue Seasoning 
Cover and let sit in the refrigerator for 30 minutes.
Pre-heat oven to 425 degrees
Place rib in deep well cooking pan big enough to fit all the ribs.
Place pan in oven and let the ribs cook for 1 hour.
Then turn oven down to 325 degrees and let cook for 2-1/2 hours.
Remove from the oven and brush with Jake's BBQ Southern Style Original , Texas Medium or Really Hot BBQ Sauce whichever you desire.
Turn the oven up to 350 degrees.
Place the BBQ ribs back in the oven for 30 more minutes. 
Remove from the oven, let sit for 2 minutes

Serve.

Barbecued Chicken Thighs

A simple barbecue chicken recipe that is can be used again and again......

Ingredients:
1/2 teaspoon paprika
1/4 teaspoon ground turmeric
1/4 teaspoon salt

Remove chicken skin, if desired. In a small mixing bowl combine paprika, turmeric, and salt; rub over the chicken.

Grill barbecue chicken on an uncovered grill directly over medium coals for 20 minutes. Turn chicken; grill for 15 to 20 minutes more or until barbecue chicken is tender and no longer pink. (Or, place barbecue chicken on the unheated rack of a broiler pan. Broil 5 to 6 inches from the heat for 28 to 32 minutes, turning once.) Brush with Jake's Mild Barbecue sauce during the last 5 minutes of grilling or broiling. 

Serve.

Add Ons:   Thread chunks of red sweet pepper, barbecue corn on the cob, and zucchini on skewers for a quick partner to grill with the barbecue chicken thighs.
This barbecue chicken thigh recipe will be a barbecue recipe that will delight your family and fellow barbecue chicken recipe grill thighs lovers everywhere.

Recipe: Cranberry Iced Tea
4 Cups of Cranberry Juice
1 Cup of Pomegranate Juice
2 Tablespoons Brown Sugar
8 Cups of Sweetened Tea
2 Lemons Juiced
2 Limes Juiced
10 Fresh mint leaves

Take the lemon and lime juices with the brown sugar and mix together thoroughly. Add a few slices of mint leaves to the juices. Afterward add the sweet tea, pomegranate juice and cranberry juice and mix well.

Pour into container and chill or serve over ice and garnish with fresh mint.

Serve.

Thursday, April 11, 2013

5 Practical Tips for The Barbecue and Smoker


Over the past few months since the introduction of our Smoker and UDS (Ugly Drum Smoker) units we’ve collected information which we believe will be useful to anyone that is new to Barbecue and Smoking.  This is a short post so we’ll get right to the action.

  1.  Preparation is key.  When beginning the process or readying your smoker and the meat you’ll use you’ll want to plan the area for preparation, the area for meat storage and the area in which you’ll get the job done. If space is at a premium then this step is critical to your success.
  2. We can’t say enough about safety around the smoker.  When we started our series we advocated starting the chimney starter with charcoal.  After the charcoal was ready one would dump the lit charcoal on top of the charcoal basket after making a small well for the lit charcoal to reside.  One would then lift the basket placing it in the UDS very gingerly while making sure not to come in contact with the hot coals.  Well, we know that most would not be as careful as we are about the process so we’ve changed our stance on handling the basket.  The firestarter is fine when started on a metal surface over concrete.  As for the charcoal basket, we now advocate pouring the lit charcoals over the basket after it has been inserted and positioned in the UDS.  This will ensure maximum safety while reducing any potential for burning. 
  3. Use only Non-self ignitable charcoal.  That’s a mouthful but essentially you want to have charcoal that does not carry its own lighter fluid.  Charcoal with lighter fluid will burn too fast causing overcooking of your meats.  This type of charcoal also makes it very difficult to manage heat.  Choose standard non-self ignitable charcoal when purchasing.
  4.  Have a good set of heat resistant gloves handy when using the smoker.  If you use the hanging method for meats which we love then you’ll want to make sure that you’re able to get the meat off the hooks when necessary.  If you overcook the meats or they simply shrink around the hooks, separating the meat from the hooks can be an issue.  Gloves will protect you against the heat of the smoker and will assist you in the meat removal process. 
  5.  A table as simple as it seems is a big help when smoking meats.  The process of smoking requires a number of steps and somewhere to hold things while you check on the meat, examine the temperature, add more coals and so on.  A small 3 X 5 table will ultimately make your job easier and less tiresome.  
Of course we can’t end this discussion without mentioning the use of a great barbecue seasoning rub or bbq marinade as well as time for preparation.  A good seasoning such as Jake’s will break down the muscle fibers of the meat allowing the seasonings to do their job of marinating.  The same goes for bbq marinades, should you use them?….Of course. 

For more tips and suggestions on using your UDS or barbecue be sure to check back often.  Or simply go to our website at www.jakesbbqsauce.com for homemade bbq sauce recipes as well as dry rub recipes. 

How to Clean Pork BBQ Ribs

Clean ribs is a primary requirement prior to barbecue.  But before you add dry rubs, marinades and seasoning, we'll need to spend some t...